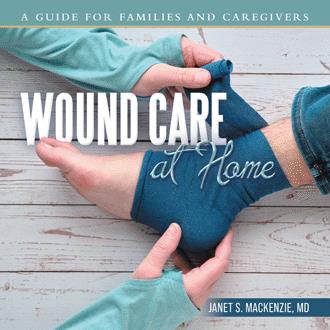
Wound Care at Home
A Guide for Families and Caregivers
by
Book Cover & Preview Text
Step-by-Step Wound Cleansing and Dressing Technique Now that we’ve reviewed some wound dos and don’ts, let’s go over some techniques. All wound care starts with very thorough hand washing, often called “hand hygiene”. Clean Your Hands. Gloves aren’t a substitute for hand hygiene. They can’t block all your hand’s bacteria from getting into the wound. This is why clean gloves over inadequately washed hands is dangerous for the patient, and why hand washing is so important. Glove permeability varies widely depending on the glove material, packaging, and duration of wear; bacteria can penetrate gloves 1-52% of the time4. Latex gloves are somewhat better bacterial barriers than vinyl gloves but can’t be used if the patient or caregiver is sensitive to latex. • Wash hands and wrists thoroughly with soap and warm water for at least 20 seconds. This will feel like quite a long time when you’re standing at the sink rewashing skin that you’ve already gone over with soap, but that’s what it takes to really get clean (from a bacterial standpoint, anyway). You can count off 20 seconds in your head, saying “Mississippi” after each number. You can mentally hum 20 seconds of a song, such as the first two lines of “Somewhere Over the Rainbow” or “Happy Birthday” twice. Dry your hands on a clean disposable paper towel, not a reusable hand towel or kitchen towel. • Use an alcohol-based hand sanitizer if soap and water aren’t available. Squirt a generous amount into your hand and rub it up to your wrists. Your hands should be wet after you’ve applied it. Let your hands dry and then proceed. Waving your hands back and forth helps sanitizer dry more quickly. Don’t use a towel to dry your hands; evaporation is important for the sanitizer to be effective. Once you’ve thoroughly cleansed your hands, you’re ready to start changing the dressing. These step-by-step instructions illustrate the typical procedure for changing a non-sterile wound dressing at home. If your provider gave you instructions that differ from these steps, follow your provider’s plan. These steps outline what is called clean technique, not sterile technique. I have almost never seen a family do sterile dressings at home, but there may be situations in which this is indicated. If your provider has ordered a sterile dressing procedure, follow the steps you were shown in the hospital or care facility. It will differ slightly from these steps. 1. Create a clean workspace by clearing a table or surface. Wipe it down with kitchen wipes or other cleaning products. 2. Gather supplies: • Clean disposable gloves. Put two pair on the table; keep the box nearby in case you need more • Gauze pads • Saline solution, wound cleanser, or whatever cleansing agent you’ve been told to use on the wound • Two clean towels, one to use and one spare in case you need it • Plastic bag for the old dressing • New dressing materials • Medical tape, if needed • Scissors, if needed (Optional: It can be helpful to saturate a few gauze pads with wound cleansing solution before continuing. Open one side of the packet to wet the gauze; open the packet completely when you’re ready to use them.) 3. Get your loved one in a comfortable position that allows you to access the wound. 4. Tuck one towel under the patient to catch any cleansing solution that drips. 5. Wash your hands for at least 20 seconds (as explained above). 6. Put on clean disposable gloves.
Formats

Book Details
About the Book
Caring for wounds after hospital or nursing home discharge can be overwhelming. You might doubt yourself, asking am I doing it right? How do I know if there’s a problem? If so, when should I worry? I’m not an expert; where can I find medical information written in everyday language? You’re not alone in questioning yourself, but know that you can do wound care at home, even without medical training. This guide tackles all of that and more! Wound Care at Home is a thoughtful and deeply practical guide for first-time caregivers. Dr. Janet Mackenzie arms readers with crucial knowledge, important resources, and encouragement for taking up the duties of wound care at home. It’s packed with tips and tricks and step-by-step instructions written by a physician expert with decades in the field. “We simply take it for granted that patients know how to change a dressing when in fact, they find it a terrifying and daunting process which we never explain. I think this will be an incredibly valuable resource. Caroline Fife, MD Professor of Medicine, Baylor College of Medicine Chief Medical Officer, Intellicure
About the Author
Janet S. Mackenzie, MD, CWSP, ABPS is a board-certified wound care physician and surgeon who is passionate about wound care. She has decades of experience caring for patients with wounds in hospitals, clinics, nursing care facilities, and home settings. She is an innovative educator, frequent lecturer, consultant, author, and advocate for patients with wounds.